


I love making my little guys bow ties. They are a quick and easy way to dress up their outfits, or cute photo props and make them look like I put them in different suits every Sunday. You can choose any fabric you like to give you lots of options!

Tutorial after the cut.
So lets get started! Here is what you will need for
One toddler size bow tie:
About 1/4 piece of fabric
About 1/3 piece of Medium weight interfacing
Matching thread
Elastic (optional but you need to choose one of these three, or more.)
Snaps (Optional but you need to choose one of these three, or more.)
Velcro (optional but you need to choose one of these three, or more.)
One infant size bow tie:
About 1/4 piece of fabric
About 1/4 piece of Medium weight interfacing
Matching thread
Elastic (optional but you need to choose one of these three, or more.)
Snaps (Optional but you need to choose one of these three, or more.)
Velcro (optional but you need to choose one of these three, or more.)
One adult size bow tie:
About 1/4 piece of fabric
About 1/4 piece of Medium weight interfacing
Matching thread
Elastic (optional but you need to choose one of these three, or more.)
Snaps (Optional but you need to choose one of these three, or more.)
Velcro (optional but you need to choose one of these three, or more.)
Sensing a theme here??? haha
That's it!
First:
Cut your fabric:

Everyone's tie pieces ^

Toddler tie pieces ^
Sizing:
For an infant tie you want to cut your pieces as follows:
Two pieces 2.5 x 8 inches of main fabric
one pice 2.5 x8 inches of interfacing
one piece for the middle 2x3 inches
Neck piece 2.5x5 inches. You may want to make this longer, but I also add elastic so mine does not go around his neck all the way.
For a toddler tie
Two pieces 3x10 inches of main fabric
One piece 3x10 inches of interfacing
One piece 2.5x 4 inches
one piece 3.5x 6 inches You may want to make this longer, but I also add elastic so mine does not go around his neck all the way.For adult tie
Two pieces 3.5x13 inches of main fabric
One piece 3.5x13 inches of interfacing
One piece 4x 3 inches
one piece 4x10 inches You may want to make this longer, but I also add elastic so mine does not go around his neck all the way.Step two:

Iron your interfacing to your fabric
Step three:


Stack your fabric right sides together with interfacing out. Sew 1/4" seam around the whole thing, leaving about a 2" gap at one of the ends. Clip corners.

Turn fabric right side out through the hole you made and iron flat.
Step five:


Fold your fabric in half and sew the ends together so you have a circle. My machines zig zag stitch is broken but if you have one on yours I would suggest sewing them flat.
Step six:

Fold the tie in half and sew a line through the layers about 1 inch long.
Step seven:
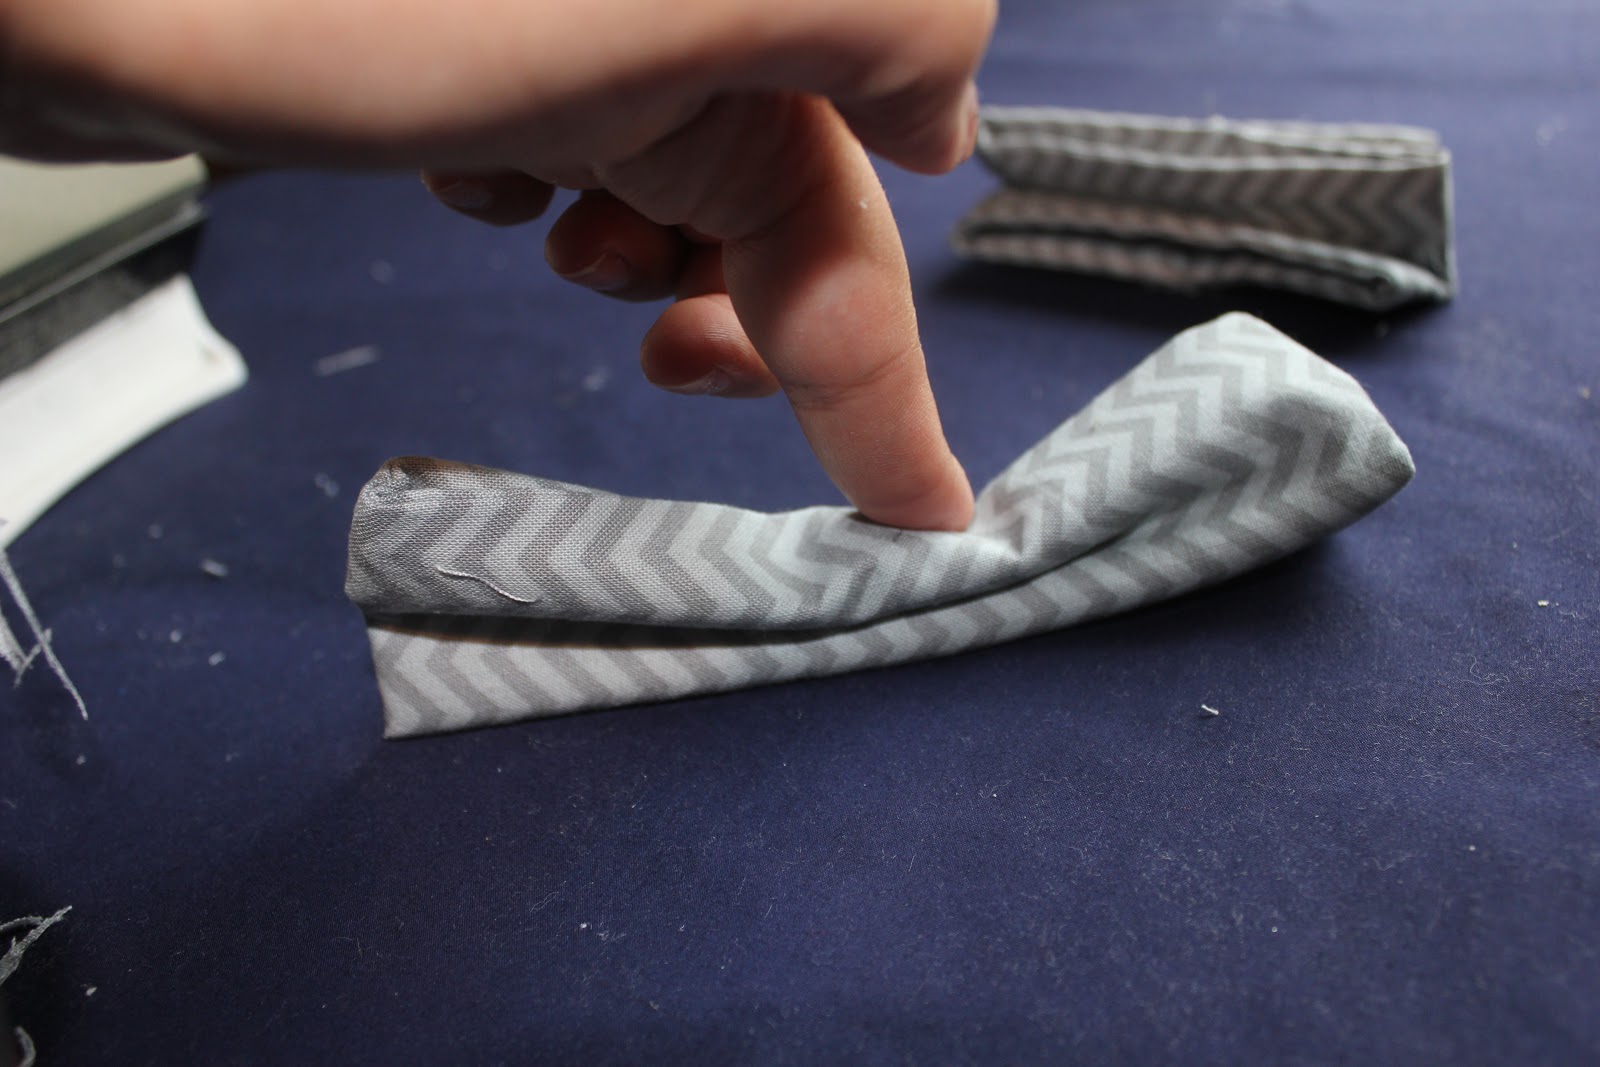
Fold the sides back and iron it down lightly so that it create creases.
Step Eight:

I forgot to take a picture of the first part of this but take your smallest piece of fabric and fold your it in half, right sides together and sew a 1/4" seam. Then turn it right side out and iron flat.

fold the ends in so they have a nice look.
Step Nine:

Sew the ends together like you did the bow tie main piece.
Step ten your neck piece:

This is how I do my middle piece, you can just cut a longer piece and add snaps, velcro, or some other closure to both sides but I like this way the best.
Lay you neck piece flat right sides up, place your elastic close to the bottom and fold your piece over. Sew around the out side starting at the short side where you elastic is, making sure to go over the elastic and secure it in place. After you are done sewing pull the elastic to flip the whole thing right sides out. It should look like the image below now.

Step eleven:

Your almost done! turn your edges in and sew the last little part shut. Add a snap to the elastic side that is not attached to the fabric and a snap to the fabric that is not attached to the elastic.
Step twelve:

put the bow tie and the neck strap through the middle piece.
Step thirteen:

Hand sew all three pieces together so they don't move around and it is nice and tight!

Tada you are done! In about 1 hour and about $5 later I have three new bow ties.


Look at those cute boys I got and those cute bow ties they have so easy and fun! You can even make a smaller one and attach it to a hair clip and mom or sister can match too!
Love this post & your blog. As a fellow blogger & mommy I think I will be visiting your page often for cute ideas for my little guy. I would also like to tell you because I enjoy your blog so much I have nominated you for the ONE LOVELY BLOG AWARD http://1singlemommy2monsters.blogspot.com/2012/11/one-lovely-blog-award.html
ReplyDeleteThanks momma! I read your post and it was really awesome! Thank you so much for nominating me! I am going to do it too when I get a minute. These boys have been trying me these past weeks!!
Deleteglad i found this- my son just realized he loves ties- this will be perfect to change from a tie. :)
ReplyDeleteThat is a super idea for little boys. How cute! They usually miss out on the cute bows. :D
ReplyDeleteNatasha Brodsky - natasha.brodsky82@gmail.com
Great post!
ReplyDeleteI can see that you are an expert at your field! I am launching a website soon, and your information will be very useful for me.. Thanks for all your help and wishing you all the success in your business.
ReplyDeletebow ties
I cannot hardly read this on the dark background.
ReplyDelete